Winding down with mint chocolate mousse

chocolatemintmousse

Last week I traveled for work. No matter how long I’m gone, it’s always nice to come home to my own space.

Because I didn’t return home until late Saturday afternoon, I knew I’d only have one full day of the weekend to myself. So I planned to do some cooking. To get a head start, I decided to make dessert.

Work has been particularly time-consuming lately, so much so that I haven’t had time to try anything from the new cookbook I bought in April, Curtis Stone’s “What’s for Dinner?” That was the first place I looked for inspiration. I settled on his Bittersweet-chocolate Mint Mousse.

Stone’s version of the mousse is thick and creamy, and the mint extract helps to bring out the richness of the chocolate. Other versions of mousse that I’ve made ended up overly foamy or the chocolate flavor wasn’t rich enough. The texture and flavor in this recipe are just about how I prefer them to be.

The only cooking involved is melting the chocolate. Making something with eggs that aren’t cooked always makes me a bit uneasy, so I researched whether it was OK and found this page in the Farmers’ Almanac, which stated that the risk of salmonella is low. If you’re worried about consuming the raw eggs, it also suggests substitutes for them.

Ingredients
7 ounces bittersweet chocolate (70% cacao), coarsely chopped
2 tablespoons unsalted butter, thinly sliced
1/2 cup whole milk
3 large eggs, separated
2/3 cup confectioners’ sugar
1 cup heavy cream
1/8 teaspoon mint extract (use 1/4 teaspoon if at high altitude)

Set a large heatproof bowl over a saucepan of barely simmering water. Add the chocolate and butter to the bowl and stir until melted and smooth. Remove the bowl from the saucepan. Whisk in the milk. Let stand for about 15 minutes, stirring occasionally, or until the mixture is cool.

In a medium bowl, using an electric mixer, beat the egg yolks and 1/3 cup of the confectioners’ sugar on medium-high speed, until light and airy. In another medium bowl, using clean beaters, beat the egg whites with the remaining 1/3 cup confectioners’ sugar on medium-high speed until soft peaks form. Using a large flexible spatula, fold the egg yolk mixture into the cooled chocolate mixture. Gently fold in the egg white mixture.

Add the cream and the mint extract to the bowl that held the egg whites. Beat with the mixer (no need to clean the beaters) on high speed until thick, soft peaks form. Fold the whipped cream into the chocolate mixture.

Divide the mousse among six to eight dessert cups or bowls. Cover each one with plastic wrap. Refrigerate for at least two hours to chill and set the mousse.

Dreaming of summertime

strawberryshortcake1

When I went home for a visit a couple weeks ago, I was delighted to see the farm stands were already offering strawberries. I bought a box of them — six baskets for $6 — and ate a bowl of them daily for about a week once I returned to Tahoe. Still, I had about three baskets that needed to be baked into something to keep them from going bad. Good strawberries can’t be left to waste. I settled on strawberry shortcake, something I don’t make often, but enjoy quite a bit when it turns out just right.

I have never been crazy about those packaged shortcakes sold near the strawberries at the grocery store — the spongey ones that have somewhat of a dip at the top for the strawberries to sit in. I hadn’t made my own biscuits in a long time, so I turned to the Joy of Cooking to see what it suggested. It had a couple options, but I settled on cream biscuits this time around. They were, by far, the best ones I had ever made for strawberry shortcake. I am not big on rolling out dough; I prefer to shape it with my hands when I can. I divided the dough into eight pieces and formed them into rounds on a baking sheet. You may also roll out the dough and divide it into more pieces if you’d like. The biscuits were easy and the flavor and texture were just how I hoped they would be. Topped with the macerated strawberries (I added some of Penzeys Vanilla Sugar to the mixture for a bit of extra flavor) and whipped cream, this was the dessert I was craving. I was thrilled. Summer will be here soon enough.

Ingredientsstrawberryshortcake3
4 cups strawberries
1/4 cup sugar
1 1/2 cups heavy whipping cream
2 cups all-purpose flour
2 1/2 teaspoons baking powder (use 2 if at high altitude)
1/2 to 2/3 teaspoon salt (use one teaspoon if at high altitude)
1 1/4 cups heavy whipping cream

Rinse and quarter the strawberries. Using a potato masher or other tool, partially crush the strawberries. Put them in a bowl with the sugar. Set in fridge.

strawberryshortcake4Preheat the oven to 450 degrees F. Whisk together flour, baking powder and salt. Add 1 1/2 cups heavy whipping cream. Mix with a rubber spatula, wooden spoon or fork until most of the dry ingredients are moistened. Knead until smooth. Divide the dough into eight parts. Shape into 3-inch rounds that are about 3/4-inch thick. Place on a baking sheet with a sheet of parchment paper. Bake for 12 minutes or until slightly browned. Remove from oven and let cool for 15-20 minutes.

Whip the 1 1/4 cups heavy whipping cream until soft peaks form.

To assemble, cut the biscuits in half so there’s a top and bottom. Spoon generous spoonfuls of the strawberry mixture onto the bottom half of the biscuit. Top with a large dollop of whipped cream. Top with the other half biscuit.

Angel food cake for all altitudes

angelfoodcake1

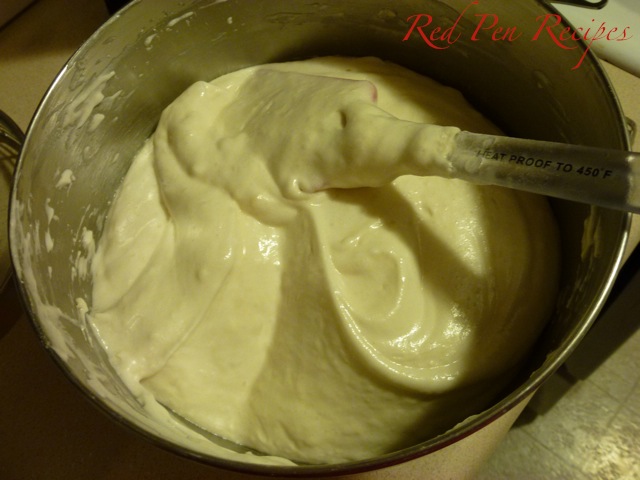
Angel food cake is characterized by its light, airy quality. The batter is a carefully crafted foam scooped into a tube pan, rather than a typical cake batter that can be poured into a normal cake pan. And it takes a lot of care to get it right.

The first time I made angel food cake was about four years ago. I had a lot of leftover egg whites and wanted to find something in which to use them. Two weeks ago, I found myself in a similar situation. I remembered the angel food cake recipe in The Joy of Cooking and pulled out my well-loved copy of the book. It’s such a delicate cake that Joy has a separate recipe for high altitude.

Taking the time to follow the instructions from the beginning until you’re ready to take the first bite will be worth it to get the angel food cake to its proper consistency. I tend to ignore many recipes that require sifting, but it’s entirely necessary to achieve the light quality of this cake. All of the ingredients must be at room temperature as well. Cold egg whites will result in a more dense cake. It’s crucial that you follow instructions to fold ingredients into the mix because stirring will break down the foamy quality of the batter. With the high-altitude recipe, make sure to cut the batter with knife as the recipe instructs, because any larger air bubbles will put your cake at greater risk of collapsing. When cooling the cake, be sure to turn the pan upside-down so it doesn’t settle and become dense. Turning it upside-down helps it keep its spongey quality.

I’ve made the cake three different times using three different extracts — orange, almond and vanilla — but never all at once. I wasn’t a fan of the orange-flavored cake, but the vanilla and almond extract versions were good. Still, I prefer to use the classic combination of vanilla and almond extract.

I’ve made this cake at sea level and at high altitude. Because the recipes are so different, I’ve included both of them below. The first is for high altitude and the second is not. As you can see, the process for each is different. I’ve had success with each version. Additional modifications may be required if you’re at an altitude higher than 10,000 feet. If you’re lower than that, one of these will work.

This is a nice cake to enjoy with tea, cream, berries or just by itself.

Ingredientsangelfoodcake2
1 cup plus 2 tablespoons sifted cake flour
1/2 cup sifted confectioners’ sugar
1 1/2 cups egg whites
1 1/2 teaspoons cream of tartar
1/2 teaspoon salt
3/4 cup sugar
2 teaspoons vanilla extract
1 teaspoon almond or orange extract
2 tablespoons water
Confectioners’ sugar

Preheat the oven to 375 degrees F.

Sift flour and sugar into a bowl and set aside.

In a large bowl, beat egg whites, cream of tartar and salt until foamy. Gradually add sugar and beat on high speed until soft, slightly droopy peaks form. Fold in extracts and water.

Add the dry ingredients one-quarter at a time, sifting them over the whites and gently folding them in, until no flour is visible. Scoop the batter into the tube pan. Cut through the batter once with a knife to burst any large air bubbles. Bake until a cake tester inserted in the center comes out clean, 25 to 30 minutes.

Let cake cool completely before frosting or wrapping airtight. If your pan has feet, turn it upside down and let cool for 1 1/2 hours. If it does not have feet, turn it upside-down on an inverted funnel or bottle to let cool. To remove the cake from the pan, slide a thin knife around the cake to detach it from the pan. Using the same procedure, detach the cake from the tube. If the pan has a removable bottom, pull the tube up to lift the cake from the pan sides. Slide the knife under the cake to detach it from the bottom.If the pan does not have a removable bottom, invert the pan and tap it against the counter to loosen the cake. Allow the cake to drop onto a rack or serving platter.

Cut the cake using a special cake comb or use a serrated knife and gently saw it. To avoid compacting the cake, do not apply a lot of pressure in a downward cutting motion.

(Angel food cake at regular altitude)
Ingredients
1 cup sifted cake flour
3/4 cup sugar
1/2 teaspoon salt
1 1/2 cups egg whites
1 tablespoon water
1 tablespoon fresh lemon juice
1 teaspoon cream of tartar
1 teaspoon vanilla
1/4 teaspoon almond extract
3/4 cup sugar

Preheat the oven to 350 degrees F.

Sift flour, sugar and salt together three times. Set aside.

In a large bowl, combine egg whites, water, lemon juice, cream of tartar, vanilla and almond extract and beat on low speed for one minute. Increase the speed to medium-high and beat until the mixture increased 4 1/2 to 5 times in volume and resembles a bowl of soft foam. The foam will hold a very soft, moist shape when the beaters are lifted. On medium-high speed, beat in sugar 1 tablespoon at a time, taking 2 to 3 minutes. When all the sugar has been added, the foam will be creamy white and hold soft, moist, glossy peaks that bend over at the points. Do not beat until stiff. If the mixer bowl is nearly full, transfer the mixture to a wide 4- to 6-quart bowl for easier folding. Sift a fine layer of the flour mixture evenly over the batter and fold gently with a rubber spatula only until the flour is almost incorporated. Do not stir or mix. Repeat seven more times, folding in the last addition until no traces of flour are visible. Pour the batter into the pan and tilt or spread to level the top. Bake until a cake tester inserted in the center comes out clean, 35 to 40 minutes.

Let cake cool completely before frosting or wrapping airtight. If your pan has feet, turn it upside down and let cool for 1 1/2 hours. If it does not have feet, turn it upside-down on an inverted funnel or bottle to let cool. To remove the cake from the pan, slide a thin knife around the cake to detach it from the pan. Using the same procedure, detach the cake from the tube. If the pan has a removable bottom, pull the tube up to lift the cake from the pan sides. Slide the knife under the cake to detach it from the bottom.If the pan does not have a removable bottom, invert the pan and tap it against the counter to loosen the cake. Allow the cake to drop onto a rack or serving platter.

Cut the cake using a special cake comb or use a serrated knife and gently saw it. To avoid compacting the cake, do not apply a lot of pressure in a downward cutting motion.

Brownies for any occasion

Germanchocolatebrownies1

Of all the desserts in the world, brownies are my favorite. They always have been, and probably always will be. While I have a couple go-to recipes, this is one I return to when I want to get a little fancy.

These German chocolate brownies look more complicated than they actually are. I got the recipe out of Good Housekeeping’s Favorite Recipes: Brownies! book, which I found years ago during one of my regular trips to Seattle. It was in a clearance pile on the basement floor of the the Barnes & Noble at the corner of Pine Street and Seventh Avenue. As someone who loves brownies, I couldn’t pass up the $4.99 price tag for a book that contained dozens of recipes for my favorite dessert. To this day, it’s one of my favorite cookbooks.

If you like chocolate, coconut and pecans, you’ll enjoy these brownies. When properly cooked, the brownie layer is fudgy, so it sticks to your teeth the slightest bit when you bite into one. The coconut layer browns during baking and adds a burst of flavor to the top. Together, the two make for a decadent treat that I’ve made time and time again.

When I first made these at high altitude, they didn’t turn out right. The brownie layer overcooked at the edges as I attempted to get the center to fully cook. The next time I made them, I added one-fourth cup cocoa powder, which turned out to be the perfect stabilizer. The brownies turned out just right. Thursday will mark one year since I moved to high altitude, and I’m happy to say I think I’m finally getting the hang of baking up here.

BrownieGermanchocolatebrownies2
1/2 cup butter
8 ounces semisweet or bittersweet baking chocolate
1 cup packed brown sugar
3 large eggs, lightly beaten
1 teaspoon vanilla extract
1 cup all-purpose flour
1/2 teaspoon salt
(If you’re at high altitude, add 1/4 cup cocoa powder)

Preheat oven to 350 degrees. Grease a 13-inch-by-9-inch pan.

To prepare the brownie, heat butter and chocolate in a 3-quart saucepan over medium-low heat until melted, stirring frequently. Remove saucepan from heat; stir in the brown sugar. Add eggs and vanilla; stir until well mixed. Stir in flour and salt just until blended. Spread batter evenly in prepared pan.

ToppingGermanchocolatebrownies3
3 large egg whites
2 cups sweetened flaked coconut
1 cup pecans, toasted and chopped
1/2 cup packed brown sugar
1/4 cup whole milk
1/2 teaspoon vanilla extract
1/8 teaspoon almond extract
1/8 teaspoon salt

To prepare the topping, beat egg whites with a wire whisk in a medium bowl until foamy. Stir in coconut, pecans, brown sugar, milk, vanilla and almond extracts and salt until well combined. Spread topping over batter.

Bake until toothpick inserted 2 inches from the edge comes out almost clean and topping turns golden brown, 45 to 50 minutes. Cool in pan on wire rack.

When cool, cut lengthwise into six strips, then cut each strip crosswise into six pieces.

Ring in the new year with an elegant treat

lemonmousse

I love the San Francisco Chronicle’s food section. It usually has a good selection of recipes that are easy enough for the average home cook. A few years ago, this recipe for Lemon Mousse was featured. At the time, my parents’ lemon tree was covered in fresh lemons that needed to be used, so this was the perfect selection. It was everything I had hoped for. Its light, citrusy flavor, creamy texture and candied lemon peel made for a great light dessert.

I thought this recipe would be a good finishing touch to a New Year’s Eve dinner. You can dish it out in small portions or large portions. I dished it into martini glasses to make it festive. Be sure to make it far enough in advance to give it the time it needs to chill. It even pairs well with a nice glass of riesling, so you can have your dessert and eat it, too.

However you ring in 2013, I hope you’re surrounded by family, friends and good food. Happy New Year!

Lemon peel garnish
3 to 4 lemons
1/2 cup granulated sugar

Using a serrated or vegetable peeler, cut strips from each lemon and julienne strips. Blanche the strips in boiling water for about 5 minutes. Pour into a sieve, discard the hot water and rinse the strips in cold water. (This process eliminates most of the peels’ bitterness.)

In a small saucepan bring the sugar and 3 tablespoons water to a boil, swirling the pan occasionally until the sugar melts. Simmer the mixture for 1 minute. Add the blanched lemon peel strips to the syrup, and stir to coat them evenly with the syrup. Pour into a sturdy container and refrigerate until serving time.

Lemon Mousse
5 large egg yolks
1/2 cup granulated sugar
1/2 cup fresh lemon juice
Finely grated zest of 1 large lemon, at least 1 tablespoon
1 pint (2 cups) cold heavy cream

Set a sieve over a heatproof bowl and set nearby. Whisk together the egg yolks, sugar, lemon juice, lemon zest and 2 tablespoons water in a 1 1/2-quart heavy saucepan until thoroughly combined. Cook over medium-low heat, whisking constantly, until the mixture thickens slightly and it registers 165° on an instant-read thermometer.

Immediately pour this lemon mixture into the sieve, pressing it through with a heat-resistant spatula. Discard the lemon zest that remains in the sieve. Allow the lemon mixture to cool before covering its surface with a sheet of plastic wrap. Refrigerate (up to 2 days) until you’re ready to finish the mousse. The lemon mixture thickens as it chills for several hours or overnight. To hasten the chilling, place over an ice-water bath and gently stir occasionally.

To assemble, whip the heavy cream until stiff peaks form. Fold half of the whipped cream into the thickened lemon mixture to lighten it. Whisk the remaining whipped cream in the bowl to thicken the cream more and fold it into the mousse. Divide it among 8 stemmed glasses or bowls and serve immediately, or refrigerate covered with plastic wrap for up to 1 day. Serve garnished with lemon peel.