Summer stone fruit serves as a sweet topping

Apricotmuffins1

Apricots are in season, and I love to use them in baked goods. I purchased a few ambercots at the farmers market a few weeks ago. Though they were delicious raw, I couldn’t eat them quickly enough, so I needed to find a recipe to use for the three I had left. Lucky for me, a recent edition of Bon Appétit contained a recipe for little apricot cakes.

As with most cakes, these proved to be a challenge at high altitude. Adding a couple tablespoons of flour usually helps keep cakes from sinking but, in this case, it made them more dense and muffin-like instead of being light like cakes. Next time I make these, I’ll stick to the original flour measurement and beat it for a shorter amount of time so the batter isn’t as stiff. Apricotmuffins2

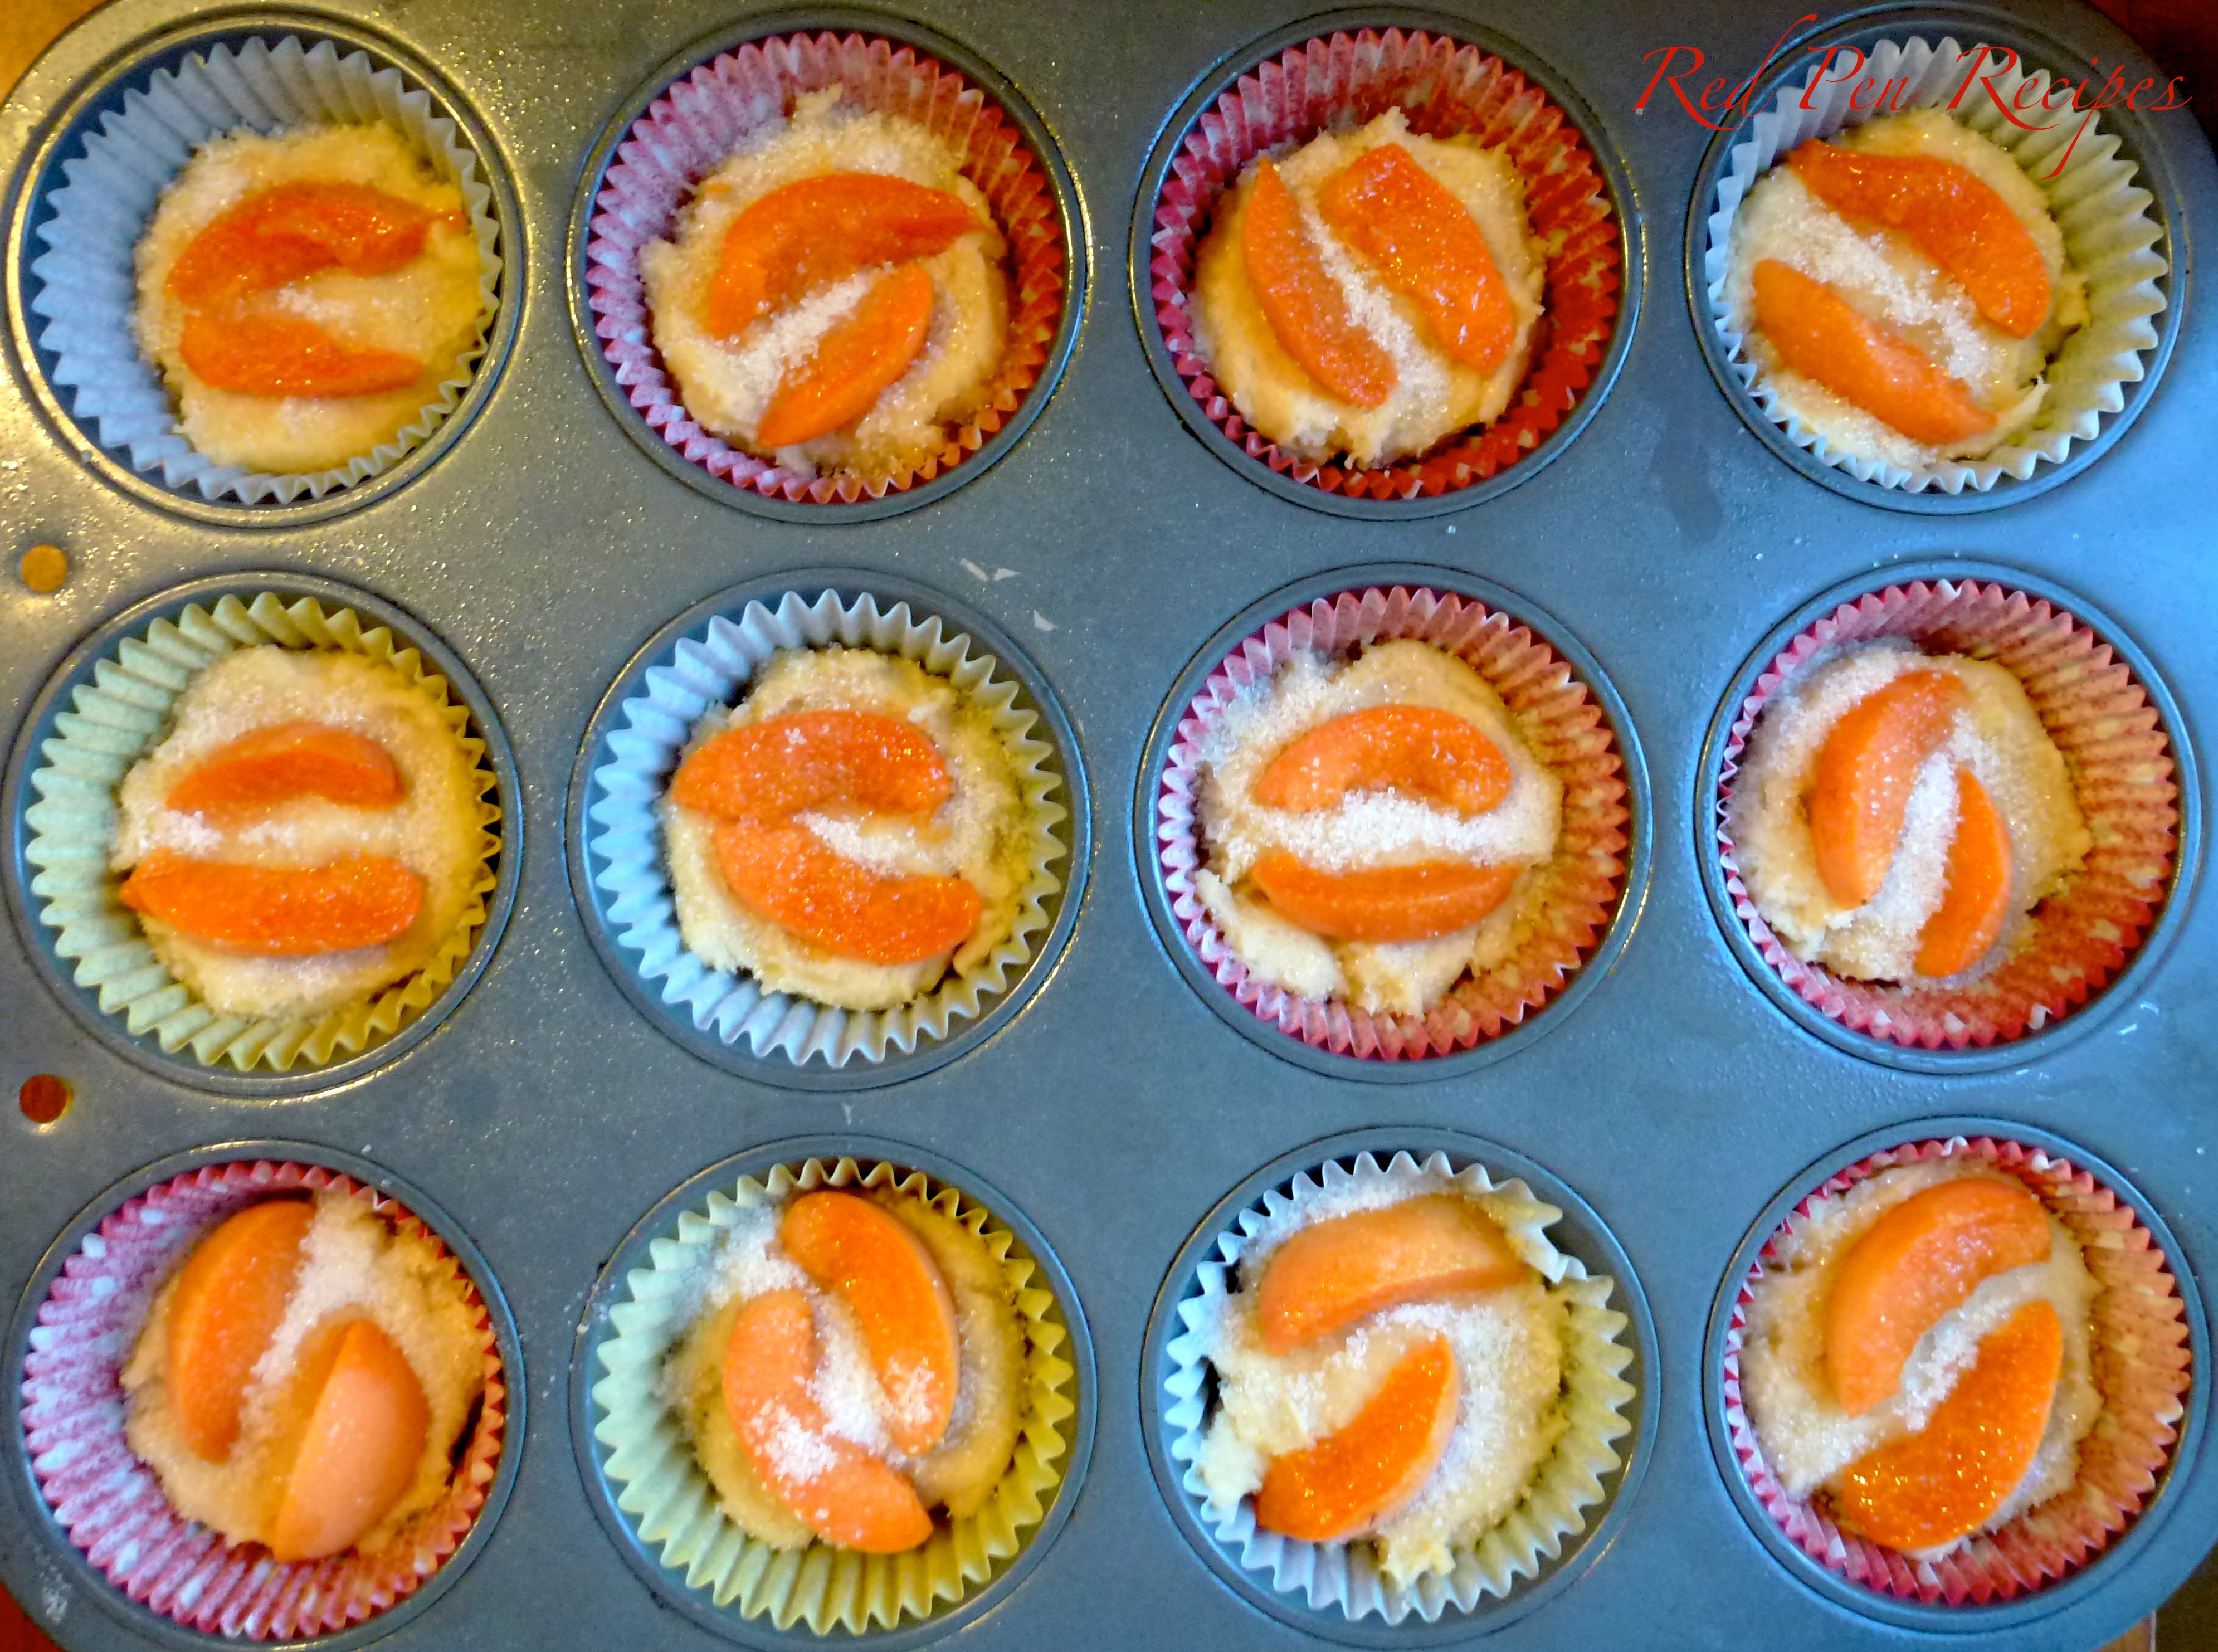
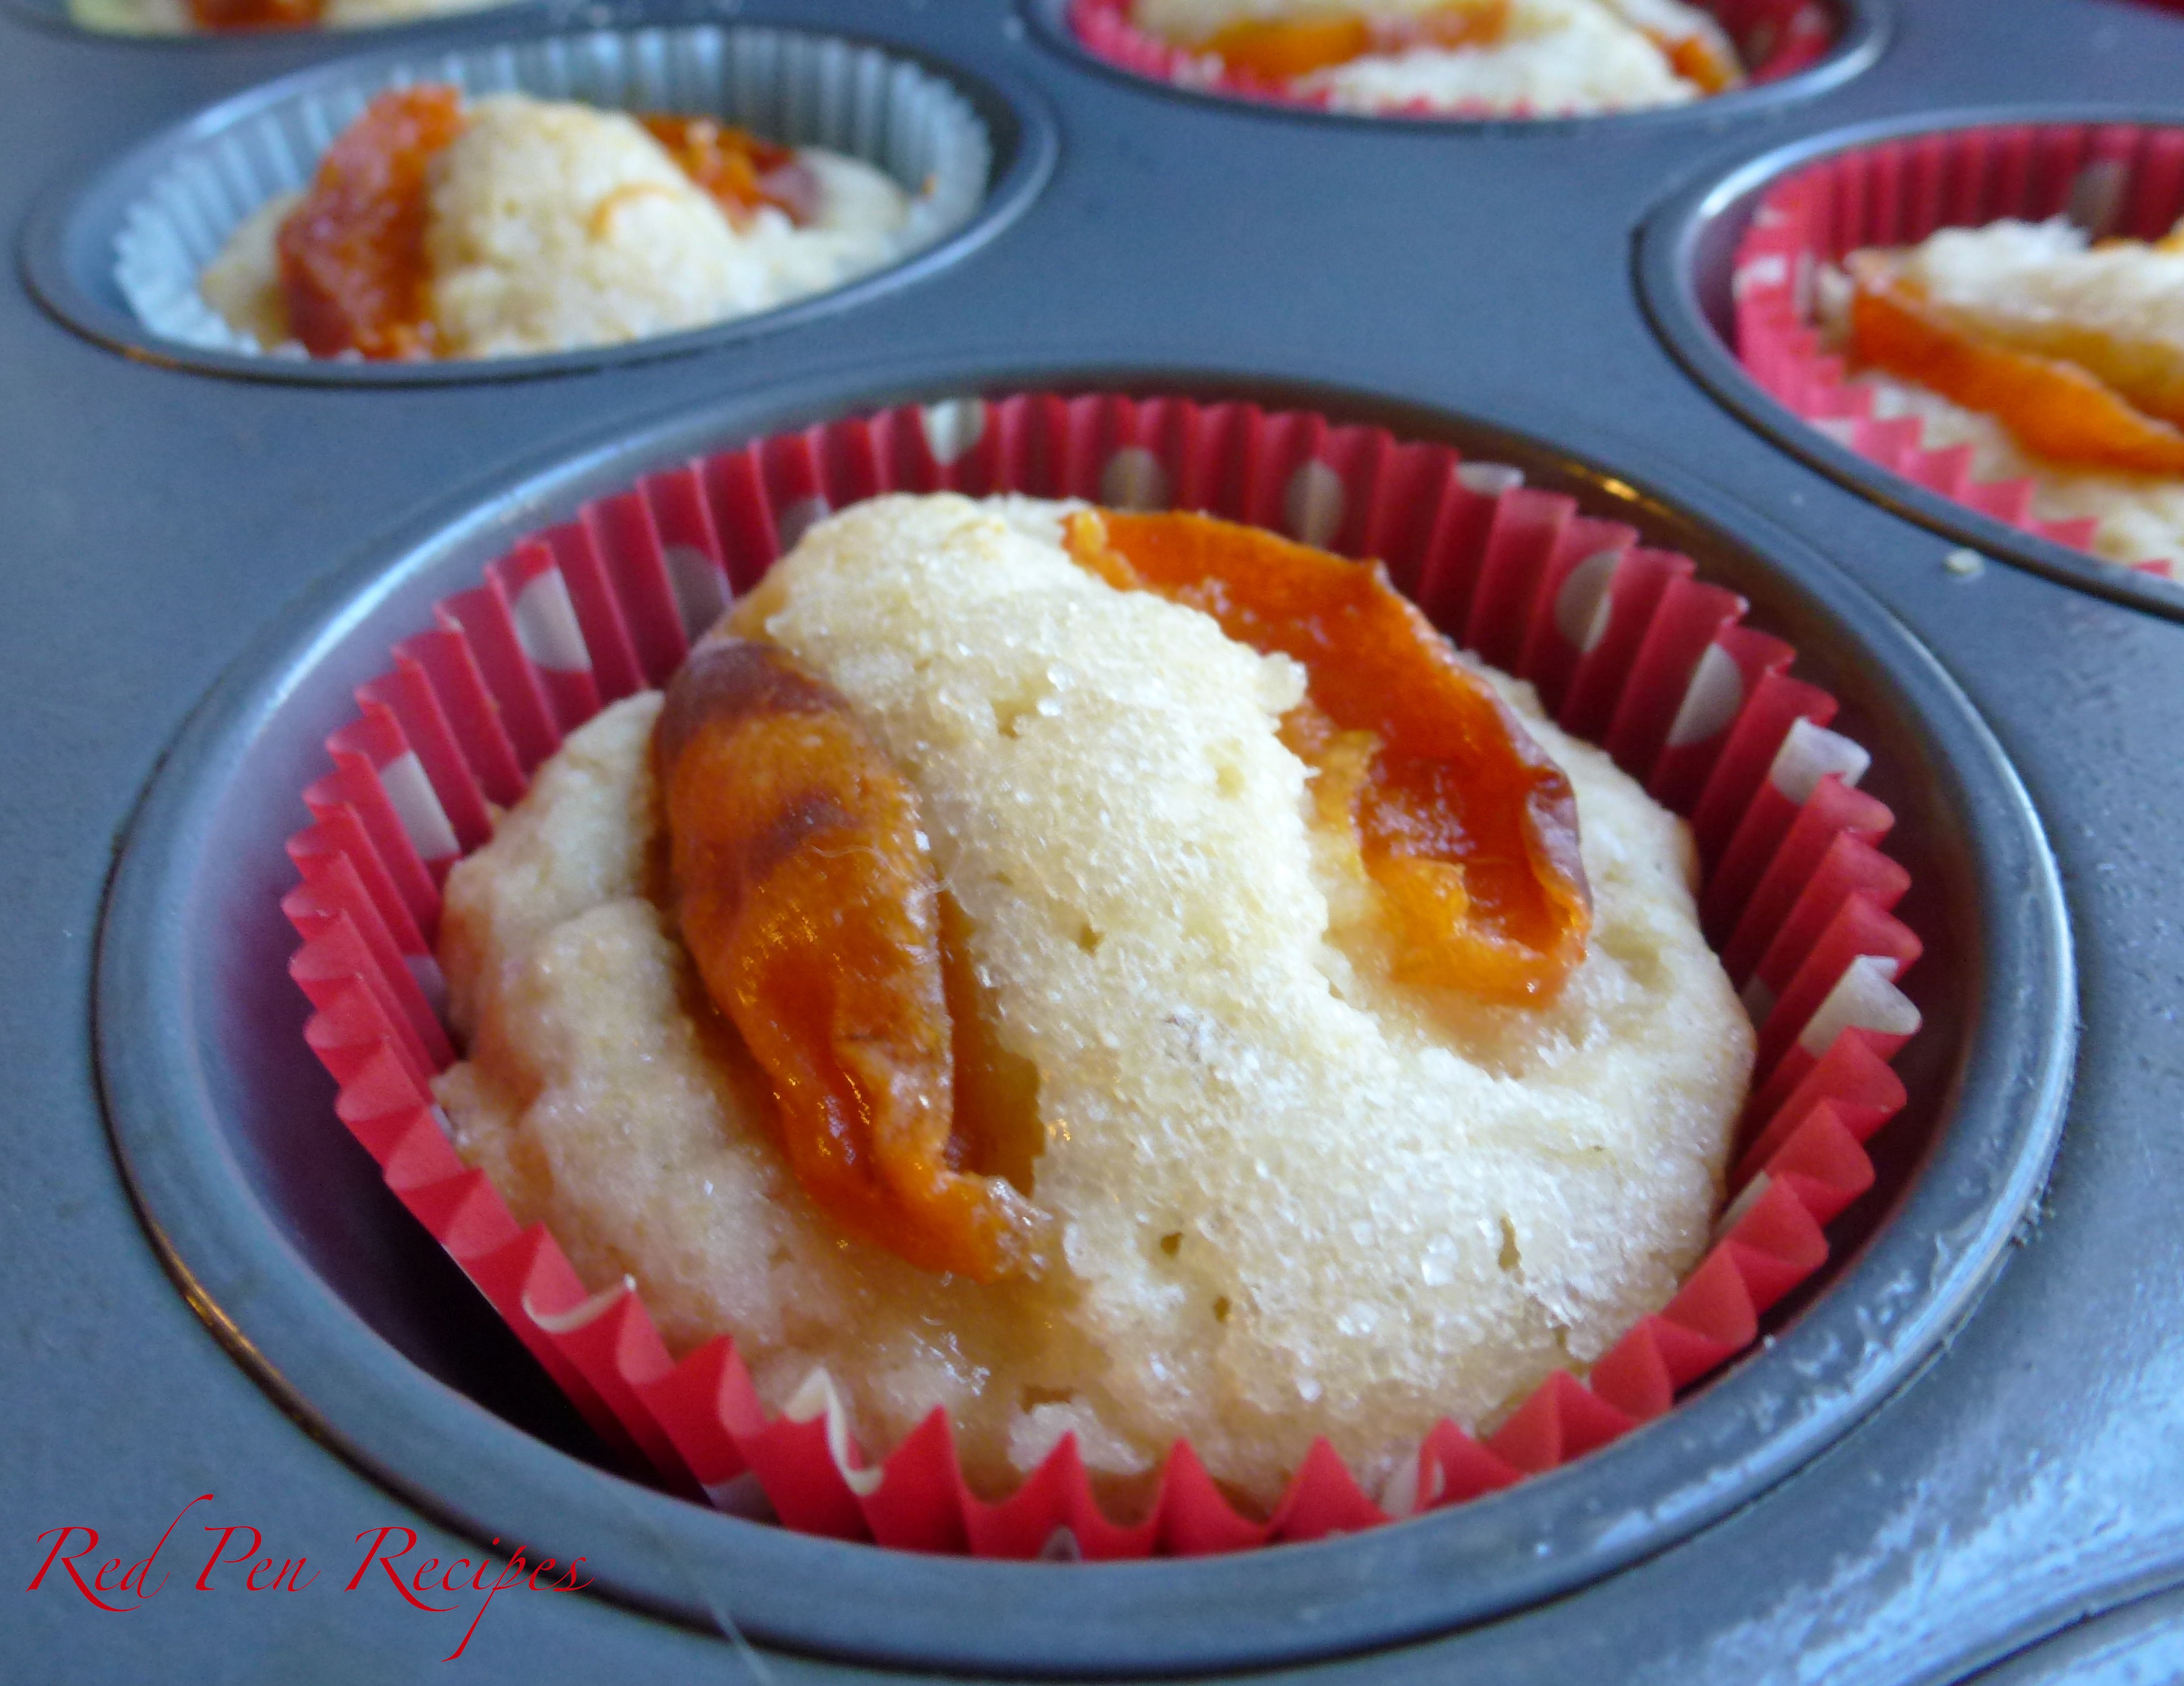
I enjoyed the sweetness and slight tart flavor of the apricots on top. They provided a nice contrast to the lemony cake beneath them. The raw sugar sprinkled on top created a nice, sugary crust once they had cooled. They’re a nice summertime treat.

Ingredients
Nonstick vegetable oil spray
1 cup all-purpose flour
1 1/2 teaspoons baking powder (use 1 teaspoon if at high altitude)
1/4 teaspoon kosher salt
6 tablespoons (3/4 stick) unsalted butter, room temperature
1/3 cup sugar
1 large egg
1 teaspoon finely grated lemon zest
1 teaspoon vanilla extract
1/3 cup whole milk
2 apricots, halved, pitted, cut into 1/4-inch wedges
2 tablespoons raw sugar

Preheat oven to 350 degrees F. Coat muffin cups with nonstick spray. Whisk flour, baking powder and salt in a medium bowl.

Using an electric mixer, beat butter and sugar in another medium bowl, occasionally scraping down sides of bowl, until light and fluffy, about 2 minutes. Add egg, lemon zest and vanilla and beat until combined.

With mixer on low speed, add dry ingredients in 3 additions alternately with milk in 2 additions, beginning and ending with dry ingredients. Divide batter among muffin cups (cups will be only 1/3 full) and smooth tops. Top with apricot slices and sprinkle with raw sugar.

Bake until cakes are golden and a tester inserted into the centers comes out clean, 20–25 minutes. Transfer pan to a wire rack; let pan cool 5 minutes. Transfer cakes to rack and let cool completely.

Getting the hang of homemade ice cream

ApricotAlmondIceCream060913

When I received an ice cream maker last month, I had the grand idea that I would make homemade ice cream on a regular basis. I thought it would be a cinch.

But it hasn’t been. Finding a good ice cream recipe has been more difficult than I anticipated. While the simpler apricot-almond recipe I first tried turned out pretty well, it wasn’t the creamy, scoopable kind of ice cream I had in mind. Since then, I have been on the hunt for something with that store-bought texture.

As it turns out, that kind of ice cream is made by first making a custard, then processing it with the ice cream maker. I tried the chocolate ice cream recipe from the manual, but it ended up being much thicker than what I was looking for. It ended up being more like frozen custard. After looking at several other recipes, I decided to see what Joy had. It had a few pages worth of recipes, but I settled on strawberry frozen yogurt to see how it would turn out. So far, it is my favorite recipe of the ones I’ve tried. It had a rich strawberry flavor, vibrant color and good texture right after making it, which I attribute to the gelatin used in the recipe. However, the next day it was stiff, so I had to let it sit for about 20 minutes before scooping. It’s still not quite the consistency I’m looking for, but the flavor is good.

So, I’m still looking for a good ice cream recipe. If you have one you’ve had success with, please share it!

Ingredients
2 cups plain low-fat yogurt
1 pint strawberries, hulled and sliced
1/3 cup sugar, to taste
1 teaspoon vanilla
pinch of salt
1 envelope (2 1/4 teaspoons) unflavored gelatin
1 cup soy milk or whole milk
1/4 cup plus 2 tablespoons sugar

Spoon yogurt into a fine-mesh sieve set over a large measuring cup or bowl. Refrigerate until 1/2 cup liquid has drained off, about 2 hours, then scrape the yogurt into a medium bowl. Discard the liquid.

Place strawberries in a food processor and pulse a few times, or until the fruit is crushed. Do not puree. A potato masher can also be used for this step. Add sugar, vanilla and salt. Cover and let stand at room temperature for one hour.

Sprinkle gelatin over 1/4 cup milk. let stand for 10 minutes to soften.

Combine 3/4 cup milk and 1/4 cup plus 2 tablespoons sugar in a medium saucepan. Bring to a simmer, stirring occasionally to dissolve hte sugar. Remove from the heat and let cool for five minutes, then add the gelatin mixture, stirring until it dissolves completely. Let cool to room temperature.

Gently whisk the milk and strawberry mixtures into the drained yogurt. Refrigerate until cold. Pour into an ice cream maker and freeze as directed. Mine was done after about 30 minutes.

Shrimp pasta suited for summer

shrimppasta070713

Summer has me in the mood for seafood, since it tends to be lighter than red meats or poultry.

After making pesto last week, I’ve been jumping at any opportunity to use it. When I was looking for ways to use some shrimp I purchased, I came across Robert Irvine’s Fresh Pesto Shrimp Pasta.

I’ve seen Irvine on “Restaurant Impossible.” At first I thought he was pretty callous, but after watching more episodes I’ve realized he really does care about the people he helps. I hadn’t made any of his recipes until I tried this one, and it’s simple, delicious and can be made quickly.

The original recipe called for two pounds of shrimp, but I only had a half pound, so I changed the amount of each of the ingredients. This version makes enough for two servings, which was perfect for me for dinner one night and to have leftovers for lunch the next day. I also substituted white pepper for the black pepper, since black pepper tends to be too harsh for my taste.

Ingredients
2 tablespoons olive oil
1/2 pound uncooked shrimp, peeled and deveined
2 tablespoons minced red onion
1/8 cup dry white wine, plus more if needed
1/4 cup heavy cream
1/4 pound spaghetti, cooked
2 tablespoons pesto
Salt and white pepper
1 tablespoon minced fresh parsley
2 tablespoons thin-sliced tomato skin, julienned

In saute pan over high heat, add the olive oil and allow to come to the verge of smoking. Next, add the shrimp and reduce the heat to medium. Continue to cook the shrimp until medium doneness, about 2 minutes, stirring frequently. After the shrimp are medium, add the onions and allow to cook until translucent, another 2 minutes. Add pesto, stir, and then deglaze the pan with the white wine. Add the heavy cream and allow to reduce by half the volume, 2 to 3 minutes. Finally, add the pasta and stir. Finish seasoning with salt, pepper and additional wine if necessary. Allow to warm for 2 minutes, and then portion and serve. Top with the parsley and tomatoes.

Pesto provides endless possibilities

pesto1063013

Never underestimate a good pesto recipe.

Pesto can be used to coat chicken for baking; it can be tossed with pasta for an easy-to-make dinner; it can be combined with a bit of mayonnaise to make a potato salad dressing — the possibilities are endless. pesto2063013

Italian basil is usually available at Tahoe farmers markets, which run from about May through September, but can sometimes be hard to find in stores. During the months when it is available, I keep homemade pesto in my fridge at all times.

The recipe I use was given to me by one of the reporters at my last job. He got it from “Pasta Cooking” by Jeni Wright. He said it was his favorite recipe, and it has become mine, too.

While some pesto recipes are more Parmesan and olive oil, this one is all about the basil, as it should be. The original also calls for four tablespoons of butter and a dash of pepper, which you can add if you like. I leave it out. Be prepared for the strong basil flavor. I love it.

pesto3063013If the pesto gets a little dry in the fridge, just stir a little more olive oil into it. It’s definitely something worth keeping around.

Ingredients
2 garlic cloves
1/4 cup pine nuts, toasted
1 packed cup of fresh basil leaves (about two bunches, just the leaves, not the stems)
1/2 cup olive oil
4 tablespoons Parmesan cheese
Dash of salt

Put all ingredients into a food processor and blend until smooth.

A recipe to ‘wow’ your guests

redvelvetcheesecakebrownies

Red Pen Recipes turned 1 year old on Friday. This time last year I was nervous about whether I’d have enough time to try new recipes often enough to write a new post each week. I’m happy to say this blog has kept me doing what I hoped it would: writing for pleasure and keeping me trying new things in the kitchen.

Of the 52 recipes I wrote about in the past year, the Rum Raisin Rice Pudding was one of my favorite new discoveries, and homemade applesauce was a close second. They’re both Barefoot Contessa recipes I hadn’t tried before.

To celebrate the one-year mark, I decided to reformat my blog. I chose this format for its cleaner look and to showcase the photos a little more. I hope you enjoy the new look.

While Friday marked the first anniversary of Red Pen Recipes, it also marked the final day for one of my staff members. One of my reporters accepted a new job in Santa Fe, N.M., so I wanted to bake something special for her before she left. I flipped through some of my cookbooks and considered a few different items before I remembered the Red Velvet Cheesecake Brownies recipe a friend gave me a few years ago.

This recipe is something I save for special occasions, when I really want to “wow” someone. It combines three desserts a lot of people enjoy, and has yet to disappoint. Cheesecake, red velvet cake and brownies can each require a rather involved process, but this three-in-one treat is pretty simple to make — you just have to use three bowls to combine different ingredients before putting them together.

Thanks for reading. I look forward to bringing you more recipes in the coming year.

Ingredients
1/2 cup unsalted butter
2 ounces dark chocolate, coarsely chopped
1 cup sugar
2 large eggs
1 teaspoon vanilla extract
1 1/2 teaspoon red food coloring (or six drops red food gel)
2/3 cup all purpose flour (use 1 cup at high altitude)
1/4 teaspoon salt (use 1/2 at high altitude)
8 ounces cream cheese, room temperature
1/3 cup sugar
1 large egg
1/2 tsp vanilla extract (use 1 teaspoon at high altitude)

Preheat oven to 350 degrees F. Butter the bottom and sides of a 8-inch square baking pan. Put a long piece of parchment paper in the bottom of the pan, letting the parchment extend up two sides of the pan and overhang slightly on both ends. (This will make it easy to remove the bars from the pan after they have baked.) Butter the parchment.


In a small, heatproof bowl, melt butter and chocolate together in the microwave. Put it in 3 seconds at a time until soft enough to stir. Stir until combined and very smooth. Set aside to cool for a few minutes.


In a large bowl, whisk together sugar, eggs, vanilla extract and red food coloring. Add chocolate mixture and stir until smooth. Add flour and salt and stir until just combined and no streaks of dry ingredients remain. Pour into prepared pan and spread into an even layer.


To prepare cheesecake mixture, beat cream cheese, sugar, egg and vanilla extract in a medium bowl until smooth. Distribute the cheesecake mixture in eight dollops over batter in the pan. Swirl in with a knife or spatula.


Bake for 35-40 minutes (it could take up between 45 and 50 minutes at high altitude), until brownies and cheesecake are set. A knife inserted into the cheesecake mixture should come out clean and the edges will be lightly browned.


Let cool completely in pan on a cooling rack before lifting out the parchment paper to remove the brownies.