Not your basic breaded chicken

mustardchicken110214

When fall rolls around, I tend to haul out my cookbooks and start looking for recipes I haven’t tried. The colder weather makes me crave savory soups and roasted meats, and I’m always looking for new ways to keep it interesting. I pulled out my copy of “Foolproof” by the Barefoot Contessa. I was shocked to realize that, although it was a gift I’d received last Christmas, I had yet to try any of the recipes.

Since it was a Tuesday after work, I wanted to keep it simple and use things I had on hand. Despite living pretty close to a grocery story, once I’m in my apartment and out of the rain, I’m reluctant to go outside again. I settled on this recipe for Crispy Mustard-Roasted Chicken.

It’s a pretty basic breaded chicken recipe, but the dijon mustard takes the flavor to the next level, so you really don’t need anything else to jazz it up. It was a perfect dinner for a weeknight and one I’ll definitely turn to again.

Ingredients
4 cloves garlic
1 tablespoon minced fresh thyme leaves
Kosher salt and freshly ground black pepper
2 cups panko (Japanese bread flakes)
1 tablespoon grated lemon zest (2 lemons)
2 tablespoons good olive oil
2 tablespoons unsalted butter, melted
1/2 cup Dijon mustard, such as Grey Poupon
1/2 cup dry white wine
1 (3 1/2- to 4-pound) chicken, cut in eighths

Preheat the oven to 350 degrees F.

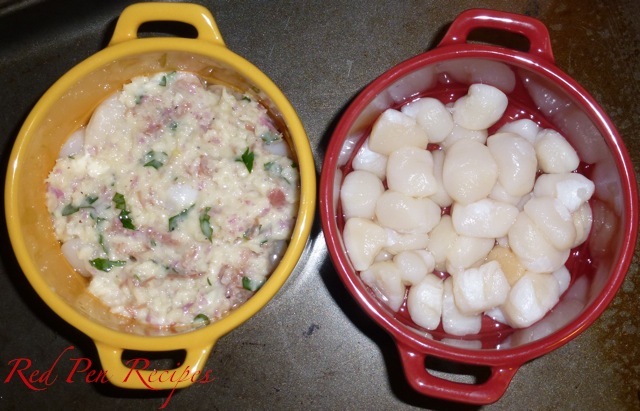
Place the garlic, thyme, 2 teaspoons salt, and 1 teaspoon pepper in a food processor fitted with the steel blade and process until the garlic is finely minced. Add the panko, lemon zest, olive oil, and butter and pulse a few times to moisten the bread flakes. Pour the mixture onto a large plate. In a shallow bowl, whisk together the mustard and wine.

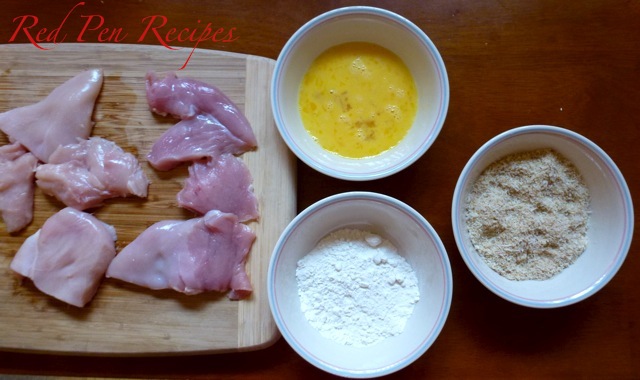
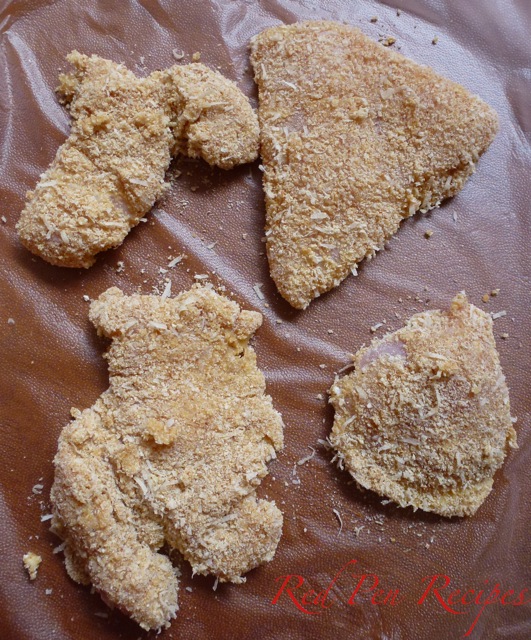
Pat the chicken dry with paper towels. Sprinkle generously all over with salt and pepper. Dip each piece in the mustard mixture to coat on all sides, and then place skin-side down only into the crumb mixture, pressing gently to make the crumbs adhere. Place the chicken on a sheet pan crumb-side up. Press the remaining crumbs on the chicken pieces.

Bake the chicken for 40 minutes. Raise the heat to 400 degrees F and bake for another 10 minutes, until the crumbs are browned and the chicken is cooked through. Serve hot, warm, or at room temperature.

Start your week with simple, flavorful salmon

1Balsamichoneysalmon110313

Most weeknights I turn to easy-to-make meals because, by the time I get home, I’m already hungry and don’t want to wait for something more elaborate.

On a recent trip to Raley’s, I picked up a copy of the store’s free “something extra” magazine for fall 2013. It contains a bunch of recipes, one of which was Maple Balsamic Baked Salmon.

While the original recipe used parchment bags, I just made my own. To do so, take a large piece of parchment paper and fold the longer sides toward the middle. Fold the other ends about an inch toward the center, so the flaps are on top. Fold each flap over once more.

I first thought the recipe might be too sweet, but it was just right. I added pieces of fresh basil on top, which nicely complemented the flavor of the fish. The best part is that the whole thing took less than 20 minutes. I’ll definitely be making this again.

Ingredients
1 1/4 to 1 1/2 pounds salmon fillets
2 tablespoons balsamic vinegar
2 tablespoons pure maple syrup
2 cloves roasted garlic, minced
Freshly ground sea salt and pepper

Season salmon with salt and pepper to taste. Place skin side down in parchment bag and place on a baking sheet. Stir together vinegar, syrup and garlic and pour over salmon in bag. Fold over to enclose. Bake at 400 degrees F for 15 minutes. Top with snipped fresh basil.

A one-dish meal fit for a dad

Bayscallopgratin1

My dad does not have fancy taste. While some dads might have white-collar jobs and commute in SUVs, mine wears a uniform and commutes on a motorcycle. Some dads might like to dine at a fancy restaurant, but mine prefers to eat his meals out of a bowl after a long day at work.

I recently purchased some bay scallops from the store. While the usual idea of just searing them and having them with a side of cous cous crossed my mind, I wanted to do something more interesting. I looked around for ideas online and came across The Barefoot Contessa’s recipe for bay scallop gratin. I had all but one ingredient — the absinthe — on hand, so I did without it. I scaled down the original recipe so it only made two servings, since I only had a half-pound of scallops.

My favorite thing about the gratin is that it was easy to assemble and put in the oven after work. During the cooking process, the butter and wine came together to form a sort of seafood broth that added a ton of flavor to the scallops. The panko added a slightly crunchy topping that was a nice contrast to the texture of everything below it. A slice of bread was a nice addition that helped soak up the remaining broth.

This one-dish meal is something I think my dad might enjoy. Happy Father’s Day.

Bayscallopgratin2Ingredients
2 tablespoons unsalted butter, at room temperature
2 small garlic cloves, minced
1 medium shallots, minced
1 ounce thinly sliced prosciutto di Parma, minced
1 tablespoons minced fresh parsley, plus extra for garnish
1 tablespoon freshly squeezed lemon juice
1 tablespoons Pernod (absinthe)
1 teaspoons kosher salt
1/4 teaspoon freshly ground black pepper
2 tablespoons good olive oil
1/4 cup panko
2 tablespoons dry white wine
1/2 pound fresh bay scallops
Lemon, for garnish

Preheat the oven to 425 degrees F. Place 2 (6-inch round) gratin dishes on a sheet pan.

To make the topping, place the butter in the bowl of an electric mixer fitted with the paddle attachment (you can also use a hand mixer). With the mixer on low speed, add the garlic, shallot, prosciutto, parsley, lemon juice, Pernod, salt, and pepper and mix until combined. With the mixer still on low, add the olive oil slowly as though making mayonnaise, until combined. Fold the panko in with a rubber spatula and set aside.

Preheat the broiler, if it’s separate from your oven.

Place 1 tablespoon of the wine in the bottom of each gratin dish. With a small sharp knife, remove the white muscle and membrane from the side of each scallop and discard. Pat the scallops dry with paper towels and divide them among both dishes. Spoon the garlic butter evenly over the top of the scallops. Bake for 12-15 minutes or until the topping is golden and sizzling and the scallops are barely done. If you want the top crustier, place the dishes under the broiler for 2 minutes, until browned. Finish with a squeeze of fresh lemon juice and a sprinkling of chopped parsley and serve immediately with crusty French bread.

Chicken cutlets ready for any night of the week

parmesanchicken1

Growing up, my family ate a lot of chicken. Mom would make Jamaican jerk chicken, lemon chicken and everything in between. My brother and I went through a phase where we complained any time it was put in front of us. “Again?” we’d ask. But mom likes chicken, and still does. Like most moms, she wanted to put something good in front of us and tried to mix it up once in a while.

I was searching for good make-ahead dinners when I saw this recipe in the March edition of Bon Appétit. I had once made Parmesan chicken and wasn’t terribly impressed by the recipe I used. This one, however, looked easy enough to put together and sounded like it would have a nice crust.

parmesanchicken2The panko and Parmigiano-Reggiano combination lends itself to a well-made crust that is packed with flavor. If you don’t have panko, regular breadcrumbs will do, though the finished cutlets won’t have as much of a crunch to them.

These freeze surprisingly well. I portioned them and kept some in the freezer for about two months. I was worried the breadcrumb mixture would turn soggy once they were defrosted, but they didn’t. They are ideal for weeknight meals. If you take them out of the freezer and let them defrost in the fridge, they will be ready to go by the time you return home. It was nice to come home during a busy work week and have something ready to toss in a pan.

This post is dedicated to moms such as mine, who work to put dinner on the table night after night, with or without thanks. Happy Mother’s Day.

parmesanchicken3Ingredients
3/4 cup all-purpose flour
2 large eggs
1 1/2 cups panko (Japanese breadcrumbs)
1/4 cup grated Parmigiano Reggiano
1 tablespoon mustard powder
Kosher salt, freshly ground pepper
4 small skinless, boneless chicken cutlets (about 1 1/2 pounds total), pounded to 1/4-inch thickness
8 tablespoons olive oil, divided
1 lemon, halved

Place flour in a shallow bowl. Beat eggs in a second shallow bowl. Combine panko, Parmesan, and mustard powder in a third shallow bowl and season mixture with salt and pepper.

Season chicken with salt and pepper, then dredge in flour, shaking off any excess. Transfer to bowl with beaten egg and turn to coat. Lift from bowl, allowing excess to drip back into bowl. Coat with panko mixture, pressing to adhere.

Chicken can be breaded 3 months in advance. Place between pieces of freezer paper or waxed paper and freeze in resealable freezer bags. Thaw before continuing.

Heat 6 tablespoons oil in a large heavy skillet or a cast-iron skillet over medium-high heat. Working in two batches, cook cutlets, adding remaining 2 tablespoons oil to pan between batches, until golden brown and cooked through, about 4 minutes per side. Transfer cutlets to a paper towel-lined plate and season with salt. Serve with lemon.

Layer up for a weeknight meal

Pesto, red peppers and cheese are three of my favorite things to eat, so when I saw them all used in AP Food Editor J.M. Hirsch’s Deep-dish Pesto and Prosciutto Tortilla Pizza, I knew I had to make it.

The recipe requires two different layers to be used three times each. One layer has tomato sauce, prosciutto and onion; the other has pesto, red peppers and olives. The prosciutto and peppers provide a nice contrast to the texture of the cheese.

Biting in to a too-thick slice of onion can ruin the dish, so take the time to slice it as thin as possible. A mandolin is a great tool to use for this recipe, as it will help to slice the onion and red pepper really thin. But be careful not to slice your hand in the process — been there, done that.

It’s also important to make sure you press down on each layer before you build the next; otherwise, the ingredients tend to heap in the process and will slide out during the baking process.

Deli meat can be used in place of prosciutto, but I prefer prosciutto because it adds a nice bit of saltiness amid all the cheese and vegetables. There is a substantial amount of cheese used in this dish so that can be reduced. It’s a rich meal but, depending on how many will be eating, you’ll have leftovers for days.

This pizza would be good to make with kids, too, because most of it requires sprinkling ingredients on a tortilla and ingredients they don’t like can easily be substituted. It can also be constructed ahead of time and refrigerated until you’re ready to pop it in the oven for dinner, which makes it perfect for a weeknight dinner.

Ingredients
7 large (about 10-inch) flour tortillas
1 cup prepared tomato or pasta sauce
6 slices prosciutto
1 small red onion, very thinly sliced
3 cups (two 6-ounce packages) shredded cheddar cheese
3 cups (two 6-ounce packages) shredded mozzarella cheese
7 ounces of pesto
1 large red bell pepper, cored and very thinly sliced
3.8-ounce can sliced black olives

Heat the oven to 350 F. Coat a baking sheet with cooking spray.

Place one flour tortilla in the center of the baking sheet. Spoon a third of the tomato sauce evenly over the tortilla, then top with two slices of prosciutto and a third of the sliced onion.

Sprinkle a bit less than 1/2 cup of each cheese over the pizza. Place a second tortilla on top and gently press the tortilla to compress and flatten it. This helps the pizza stack evenly.

Spoon a third of the pesto over the tortilla, then top with a third each of the sliced pepper and black olives. Top with more cheese, then another tortilla, pressing gently again.

Repeat with remaining ingredients, alternating the fillings for a total of six layers (three of each), gently pressing the stacked tortillas before adding each new layer.

Top with a final tortilla, a bit more tomato sauce or pesto and the remaining cheese.

Bake on the center rack for 35 minutes, checking frequently during the final 5 to 10 minutes to make sure the top doesn’t burn. If the top browns too quickly, tent it with foil.

Remove the pizza from the oven and let it stand for 5 minutes. Use a sharp knife to cut the pizza as you would a pie.