Shortbread all dressed up for the holidays

redvelvetshortbread

There is always some kind of shortbread on my Christmas cookie platter. They’re also usually the easiest cookie to make. A couple years ago, I made pecan fingers, but last year I opted to make these Red Velvet Shortbread Cookies. They were almost as easy as regular shortbread, but dolled up for the holidays by a hint of chocolate, red coloring, and a white chocolate drizzle. They were small, too, so they were perfect for people looking to nibble on treats during Christmas eve.

If you’re a fan of red velvet—as many people are—give this one a shot. You won’t be disappointed.

Ingredients
1 1/4 cups all-purpose flour
1/3 cup sugar
2 tablespoons unsweetened cocoa powder
1/4 teaspoon salt
1/2 cup butter, cut up
1 tablespoon red food coloring
3 ounces white chocolate (with cocoa butter), coarsely chopped
1 1/2 teaspoons shortening

Preheat oven to 325 degrees F. In a food processor, combine flour, sugar, cocoa powder, and salt. Cover and process with on/off turns until combined. Add butter and red food coloring. Cover and process with on/off pulses until mixture starts to cling. (If you do not have a food processor, cut in the butter and add food coloring, then knead until mixture resembles fine crumbs.) Transfer to a large bowl. Form mixture into a ball and knead until smooth.

On a lightly floured surface, roll dough to a 1/2-inch thickness. Using a floured 1-1/2-inch round cutter, cut out dough. Place cutouts 1 inch apart on an ungreased cookie sheet.

Bake for 20 to 25 minutes or until centers are set. Transfer cookies to a wire rack; let cool.

In a heavy small saucepan, cook and stir white chocolate and shortening over low heat, until melted and smooth. Drizzle cookies with melted white chocolate. Let stand until white chocolate is set.

Window cookies worth the work

If you’re a fan of jam in your cookies, this one is for you. Window cookies are the last item in my cookie countdown to Christmas. They require a bit of time and effort, but they’re beautiful. They’re worth it.

I found the recipe on the Better Homes and Gardens website. They’re a sandwich cookie, so be conscious of the thickness of the cookies when you roll out the dough. The recipe calls for 1/4-inch thickness, but I found that to be a little too thick once I made the sandwich.

You can make them your own by adding chopped nuts to the batter or using a different kind of jam. You can use any cookie cutter shape to make the design in the top cookie, too. I used a snowflake cutter and really liked how they looked. The jam and nuts complemented each other well, and I dusted mine with a bit of powdered sugar to finish them.

Make it fun, make them yours and have a Merry Christmas.

Ingredients
1 cup blanched almonds, toasted and chopped
1 tablespoon sugar
1 cup butter, softened
2/3 cup sugar
1 egg
1 egg yolk
1/2 teaspoon salt
1/2 teaspoon vanilla
1/2 teaspoon almond extract
1/4 teaspoon ground nutmeg
2 2/3 cups all-purpose flour
1/3 cup chopped hazelnuts or almonds (optional)
3/4 cup apricot jam

In a food processor, combine almonds and the 1 tablespoon sugar. Cover and process until nuts are finely ground. Set aside.

In a mixing bowl, beat butter with an electric mixer on medium to high speed for 30 seconds. Add the 2/3 cup sugar. Beat until combined, scraping bowl occasionally. Add the ground almonds, the egg, egg yolk, salt, vanilla, almond extract, and nutmeg, beating on low speed until combined. Beat in flour until combined. If adding nuts, combine them into the dough.

Divide dough into four portions. Cover and chill about 2 hours or until dough is easy to handle.

Preheat oven to 325 degrees F. Between waxed paper or parchment paper, roll out one of the dough portions to about a 1/4-inch thickness. Peel off top sheet of paper. Using a fluted 2- to 3-inch cookie cutter, cut out dough. Place dough cutouts 1 inch apart on an ungreased cookie sheet. Using a fluted 1-inch cookie cutter, cut out centers from half of the dough cutouts.

Bake for 10 to 12 minutes or until tops are a pale golden brown. Cool on cookie sheet for 2 minutes. Transfer cookies to a wire rack and let cool. Repeat with the remaining dough portions.

Spread 1 slightly rounded teaspoon of the jam in the center of each whole cookie. Top with the cutout cookies, flat sides down, pressing lightly together.

Sandwich cookies suited to a more sophisticated palate

Hazelnutmochathins120813

Cookies are great, but not all adults want the same over-sugared treats that might be made for children. What about adults looking for something sweet and a little more grown-up than your average sugar cookie?

I’m a firm believer that there needs to be something for everyone on the holiday tray, which is why I was thrilled when I found this recipe for Hazelnut-Mocha Sandwiches in the Holiday 2010 edition of America’s Test Kitchen Holiday Cookies magazine.

The chief flavors in these cookies are provided by hazelnuts, espresso and chocolate. There’s no frosting to be found and no decorating to be done. The flavor reminds me of hazelnut biscotti, just in a different form. I’ve made these twice and received rave reviews both times from adults, particularly those who also love coffee.

I hope you enjoy this third cookie in my Christmas countdown.

Ingredients
2 1/2 cups all-purpose flour
1 cup hazelnuts, toasted and finely ground
1 cup superfine sugar
1/4 teaspoon salt
16 tablespoons (2 sticks) unsalted butter, cut into 16 pieces and softened
2 teaspoons vanilla extract
2 tablespoons cream cheese
1/2 cup heavy cream
1 teaspoon instant espresso powder
12 ounces milk chocolate, chopped

Adjust oven racks to upper-middle and lower-middle positions and heat oven to 375 degrees. Line two baking sheets with parchment paper. With electric mixer on low speed, combine flour, nuts, sugar, salt and butter and mix until crumbly and slightly wet, about 2 minutes. Add vanilla and cream cheese and mix until dough just begins to form. Finish kneading dough by hand to form large, cohesive mass. Divide dough in half, wrap in plastic wrap and refrigerate 30 minutes.

Roll each dough half to 1/8-inch thickness and rechill until firm, 10 minutes. Using 2-inch round cookie cutter, cut out cookies and place 2 inches apart on prepared baking sheets. Bake until edges are light golden-brown, 8 to 10 minutes. Cool 5 minutes, then transfer to wire rack and cool completely. Repeat with remaining dough, gathering and rerolling scraps once.

In saucepan over medium-low heat, whisk together heavy cream and espresso powder. Add chocolate and stir until melted and smooth; cool 30 minutes. Spread heaping teaspoon filling over bottoms of half of cookies; top with remaining cookies. Let sit until firm, about 1 hour.

Sugary shortbread is perfect for a platter

pecanfingers

For the second cookie in my countdown to Christmas, I bring you Pecan Fingers. I found this recipe years ago in my “Good Housekeeping Favorite Recipes: Brownies!” cookbook. It’s simple and really tasty.

I include some kind of shortbread cookie on my Christmas cookie platter every year because it’s important to have one cookie that’s easy to make and not time-consuming. I save the time-consuming part for the sugar cookie decorating. One of the most important pieces of advice I can offer to anyone who is in charge of doing all the Christmas baking is not to commit to cookies that all require extensive amounts of time to make and decorate. Don’t get overly ambitious — making a large amount of cookies is ambitious enough, no matter the type. To do a platter well, you need to choose what you want to spend time on, and what you want to keep simple and delicious. There’s a large variety of shortbread recipes out there to choose from. Shortbread is one of the easiest things to make, which is why I always choose at least one type for my platter.

When I think of shortbread, I tend to think of simple, buttery, and sometimes dry, plain cookies. These pecan fingers are pretty far from that. They are sweeter than your average shortbread, but overall have a warm flavor to them because of the pecans and brown sugar. I will likely bring these back to my assortment this year because my mouth is watering just thinking about them.

Ingredients
3/4 cup butter (1 1/2 sticks), softened
1/3 cup packed dark brown sugar
1/4 cup granulated sugar
1 teaspoons vanilla extract
1/4 teaspoon salt
1 3/4 cups all-purpose flour
1/2 cup pecans, chopped

Preheat oven to 350 degrees F. In a large bowl, with a mixer at medium speed, beat butter, brown and granulated sugars, vanilla and salt until creamy, about 2 minutes. At low speed, gradually beat in flour until just evenly moistened. With hand, press dough together to form ball.

Divide dough in half. On half of an ungreased large cookie sheet, roll half of dough, covered with waxed paper, lengthwise into 12-inch by 5-inch rectangle. On same cookie sheet, repeat with remaining dough, 1 1/2 inches from first rectangle. With fork, prick dough at 1-inch intervals. Press tines of fork along long side of rectangles to form decorative edge. Sprinkle pecans evenly over rectangles; press gently to adhere.

Bake until edges are lightly browned, 20 to 25 minutes. While still warm, cut each rectangle crosswise into 12 finger-shaped cookies. Transfer fingers to wire rack to cool. Store in tightly covered container up to 1 week.

Cocoa cookies are as cute as can be

cocoacookies copy

My 2013 cookie countdown to Christmas begins with this post. I know Thanksgiving hasn’t passed yet, but I’m already testing new recipes. I put my little Christmas tree up yesterday while listening to Christmas music, so the holidays are in full force at my place. I’m excited to share some new favorites with you.

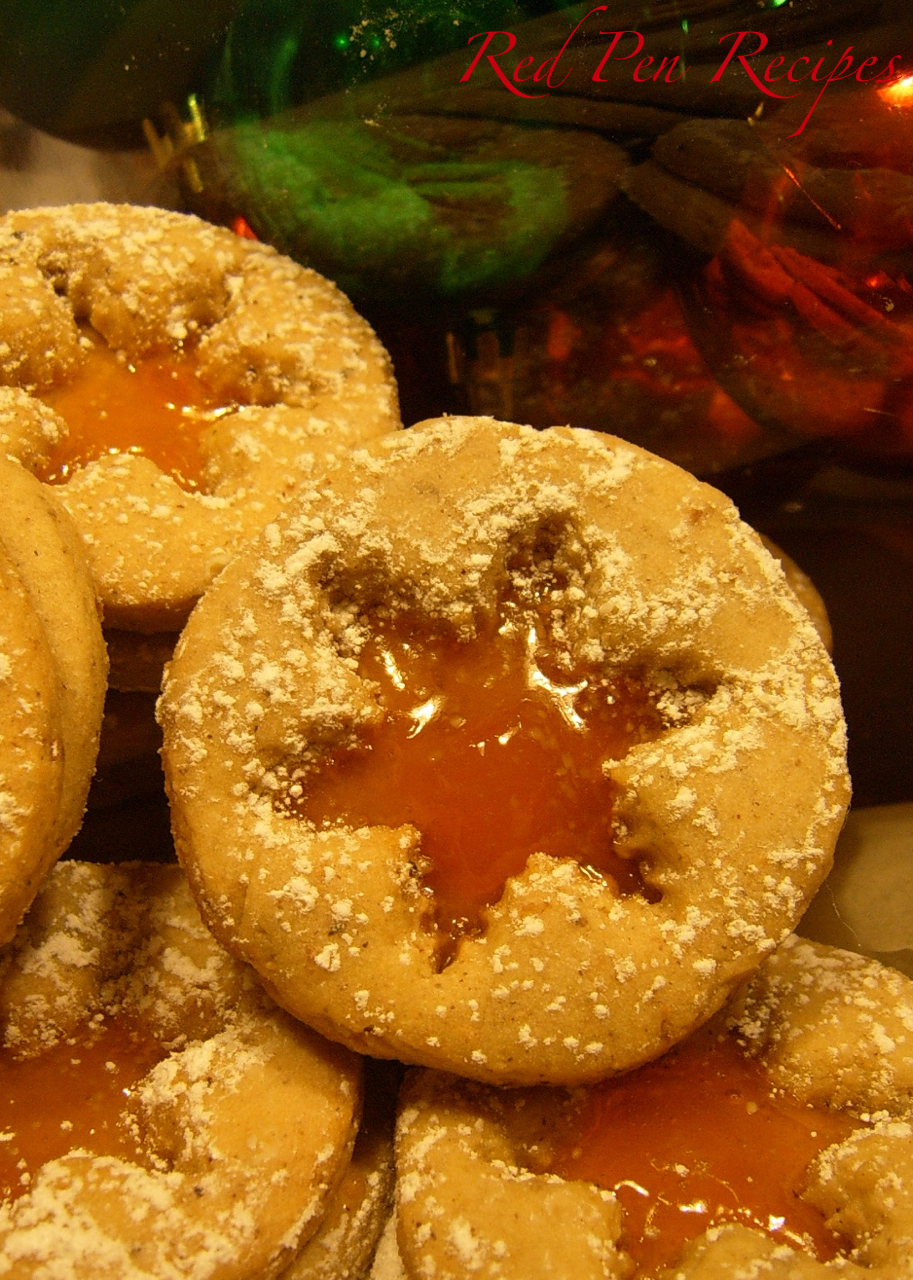
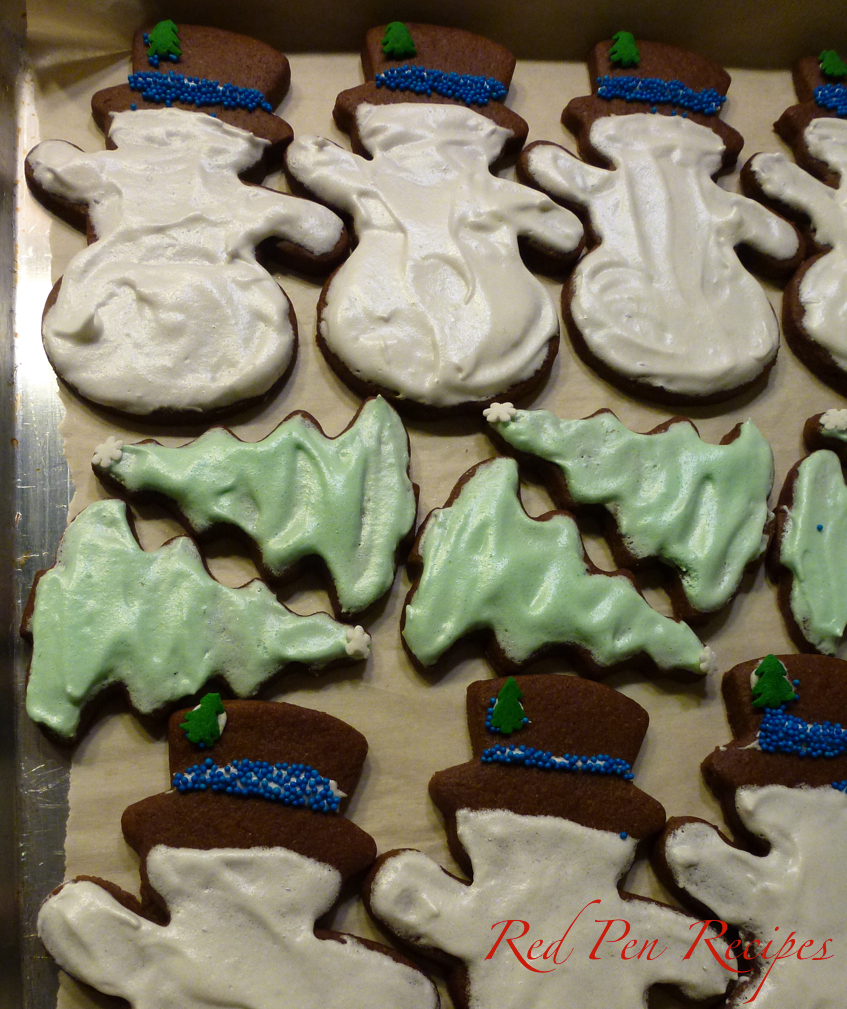
My favorite new decorated cookie from last year was Food Network Magazine’s hot cocoa cookie recipe. I saw the recipe in the December 2012 edition as I was perusing for new recipes. The cookie is a chocolate cutout cookie topped with marshmallow cream. The recipe in the magazine called for making a sandwich cookie loaded with the cream, but it only makes 15 sandwich cookies — not enough for my large family. I decided to do a single cookie topped with the cream.

Though the recipe called for store-bought marshmallow cream, I pride myself on making things from scratch. This was no exception. While I know how to make marshmallows, I didn’t know how to make marshmallow creme. I turned to this recipe from Bon Appétit for help.

The chocolate cookie isn’t too rich, and the marshmallow cream was a really nice change from traditional icing or buttercream frosting, which is what I use on my sugar cookies. Plus, it gave me a chance to decorate in a different way. I love how they turned out. They just put a smile on my face.Christmaskitchen

Cookies
2 1/4 cups cake flour, plus more for dusting
1/4 cup unsweetened Dutch-process cocoa powder
1 teaspoon baking soda
1/4 teaspoon salt
2 sticks unsalted butter, at room temperature
3/4 cup sugar
1 large egg
1 teaspoon vanilla extract

Sift the flour, cocoa powder, baking soda and salt into a medium bowl.

Beat the butter and sugar in a large bowl with a mixer on medium-high speed until light and fluffy, 3 to 5 minutes. Add the egg and vanilla and beat until incorporated. Reduce the mixer speed to low; add the flour mixture in 2 batches and beat until just incorporated. Divide the dough in half, wrap in plastic wrap and refrigerate until firm, at least 1 hour and up to 1 day.

Line 2 baking sheets with parchment paper. Working with 1 piece of dough at a time, dust the dough generously with flour and roll out between 2 pieces of parchment paper until about 1/8-inch thick. Cut out shapes using 2- to 4-inch cookie cutters and transfer to the prepared baking sheets. Gather the scraps and refrigerate until firm; reroll once to cut out more cookies. Refrigerate the cutouts until firm, about 30 minutes.

Position racks in the upper and lower thirds of the oven and preheat to 350 degrees F. Bake the cookies, switching the position of the pans halfway through, until slightly puffed and darker around the edges, 12 to 15 minutes. Let cool 5 minutes on the baking sheets, then transfer to racks to cool completely. Sandwich the cookies with the marshmallow cream.

Marshmallow creme
1 cup sugar, divided
4 egg whites
Pinch of kosher salt
1 teaspoon vanilla extract

Combine 3/4 cup sugar and 1/4 cup water in a small saucepan over medium-high heat. Attach a candy thermometer to the side of the pan and simmer syrup without stirring until the thermometer reads 240 degrees F, occasionally swirling pan and brushing down sides of pan with a wet pastry brush.

Meanwhile, place egg whites, salt, and vanilla in the bowl of a stand mixer fitted with a whip attachment. Whip on high until frothy. Slowly add remaining 1/4 cup sugar. Whip until soft peaks form. Continue whipping until medium peaks form. Reduce speed to medium, then pour hot syrup into meringue in a slow, steady stream while whipping. Increase speed to high and continue whipping until stiff peaks form. Reduce speed to medium and whip until meringue is cool.