Celebrating Easter with traditional Greek bread

GreekEasterbread

Most cultures have a special bread associated with religious holidays. St. Patrick’s Day has Irish soda bread, Christmas has stollen and Easter has Tsoureki Paschalino — Greek Easter bread.

I first saw a recipe for this sweet holiday bread in a San Francisco Chronicle food section in 2010. I liked the sound of the bread, but I didn’t want to make anything that produced three to four loaves and included a hard-to-find ingredient such as mahlepi, a fruity Greek spice. I opted to search for a more accessible version and found this.

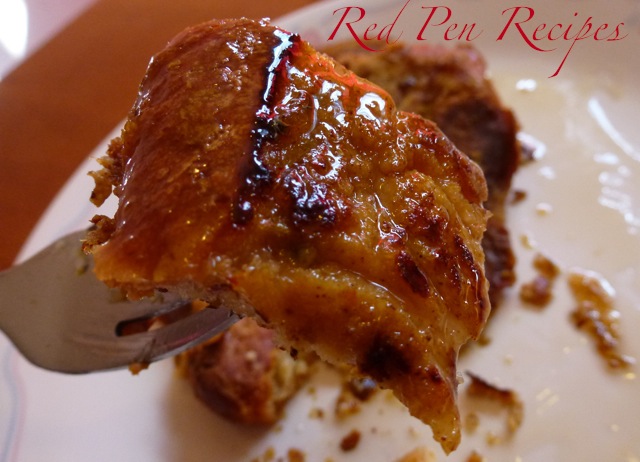
Traditional versions of the bread call for cardamom and mahlepi, but I don’t like cardamom and mahlepi isn’t something most grocery stores carry. The version I made may be less traditional, but I had all the ingredients on hand and I enjoyed the flavor of the final product. I decided to make two 12-inch loaves instead of a 24-inch loaf so I could store one and serve the other one. Everyone enjoyed this sweet bread, especially warm with a bit of butter on it. It has a nice orange spice flavor and the egg adds a nice splash of color.

Regardless of what you eat today, I hope you have a happy Easter.

Ingredients
3 to 3 1/2 cups all-purpose flour
2 tablespoons sugar
1/2 package instant yeast
1/2 teaspoon salt
Zest of 1 large orange
Pinch of nutmeg
Pinch of cinnamon
1/2 cup milk whole milk, warmed to room temperature
1/2 stick (1/4 cup) unsalted butter, melted
2 large eggs, beaten slightly; set 1 tablespoon aside for glazing
1 tablespoon fresh orange juice
1/2 teaspoon vanilla

In a large mixing bowl, thoroughly combine 3 cups flour, sugar, yeast, salt, zest, nutmeg and cinnamon.

In another large bowl or the bowl of a stand mixer combine milk, butter, all but 1 tablespoon of eggs, orange juice and vanilla. Add flour mixture and combine well using a large spoon or the paddle attachment on the stand mixer.

If mixing by hand, scoop dough out onto a well-floured surface and knead for at least 15 minutes. Adding more flour if needed.

If using a stand mixer, swap to the dough hook. Knead for at least 10 minutes at medium speed, adding more flour as needed to keep the dough from becoming too sticky, although it will be somewhat tacky if kneaded in a mixer. Scoop dough onto a lightly floured surface.

Form dough into a ball by folding edges into the center, turning over and forcing into a ball shape using your palms and fingers to shape.

Clean and dry the largest bowl, then spray lightly with cooking spray. Place dough, seam-side down, in bowl and spray top lightly with oil. Cover bowl with plastic wrap and let rise until doubled in bulk — 1 1/2 to 2 hours.

Once the dough has risen, punch it down and scoop onto a lightly floured surface. Knead by hand for 3-5 minutes.

Shape the dough into a rope 24 inches long, fold in half, and braid. If you wish, place dyed, uncooked eggs in center of the fold before braiding. They’ll end up perfectly hard-cooked but difficult to peel.

Place the loaf on a greased cookie sheet or baking pan, spritz lightly with oil, and cover with plastic. Let rise until doubled in bulk — 1 1/2 to 2 hours. Thirty to 45 minutes before dough has completely risen, heat oven to 350 degrees.

Make an egg wash using the remaining egg and one tablespoon of water. Brush loaf with the wash. Bake for 30 minutes until golden brown. You can tell the bread is done in the center by tapping the top of the loaf. If it sounds hollow, the loaf is finished. Cool on a rack.

Who knew applesauce could be so good?

applesauce1

Until recently, I had never made applesauce. My only experience with it was the kind spooned from the Mott’s jar with a yellow lid. I never found it impressive. It was something I might eat with pork chops, but not much else. That is, until I made my own.

While figuring out what to make next, I remembered I had bookmarked Ina Garten’s recipe for applesauce. Then I saw that it was baked in a Dutch oven, which is perfect since I’ve been using mine nonstop since I received it.

The recipe is straightforward, which is what I’ve come to expect from the Barefoot Contessa. That she keeps things simple is what I most like about her attitude toward cooking. Her recipe for applesauce is no exception. I had no idea applesauce could be so good until I made her flavor-packed version. applesauce2After baking the ingredients, her recipe calls for whisking them together. I left small chunks of apple in mine instead of making it the same consistency as the store-bought stuff.

Over the course of a week, I devoured the pot. It’s great for breakfast, a snack or as a dessert — and healthier than many alternatives. This applesauce may become a regular item in my refrigerator. I doubt I’ll ever purchase a jar of applesauce from the store again.

Ingredients
Zest and juice of 2 large navel oranges
Zest and juice of 1 lemon
3 pounds Granny Smith apples (6-8 apples)
3 pounds sweet red apples, such as Macoun, McIntosh or Winesap (6-8 apples)applesauce3
1/2 cup light brown sugar, packed
1/4 pound unsalted butter
2 teaspoons ground cinnamon
1/2 teaspoon ground allspice

Preheat the oven to 350 degrees.

Place the zest and juice of the oranges and lemon in a large bowl. Peel, quarter and core the apples and toss them in the juice. Pour the apples and juice into a nonreactive Dutch oven or enameled iron pot. Add the brown sugar, butter, cinnamon and allspice and cover the pot. Bake for 1 1/2 hours, or until all the apples are soft. Mix with a whisk until smooth. Serve warm or at room temperature.

A fall twist on French toast

pft

Pinterest is exploding with recipes for fall. Most of them involve pumpkin or apples or are for pie crust or soup. About a month ago, I pinned a recipe for Single-serving Pumpkin Pie French Toast, but I didn’t want to open a whole can of pumpkin for a couple tablespoons. Weeks later, I had leftover pumpkin that needed to be used, but I didn’t have enough to make another loaf of pumpkin bread. That’s when I remembered this recipe.

I’ve never made anything but traditional French toast, and this seemed simple enough. I used slices of challah, which wasn’t the best choice — it was too dry for this recipe. Choose a softer bread to absorb as much liquid as possible. The original recipe didn’t call for salt, but after digging in, I realized I should have added some. It needed it. If you don’t have pumpkin pie spice, you can add a dash each of allspice, cinnamon, ginger and nutmeg.

The nice thing about this recipe is that it makes a single serving. There are no leftovers to contend with, and it’s easy to make if you still have more of the ingredients on hand. If you want to make enough for more than one person, do the math.

Ingredients
1 egg
1/4 cup milk
1/4 teaspoon pumpkin pie spice
3 tablespoons canned pumpkin (not pumpkin pie filling)
1 teaspoon brown sugar
2 slices bread
A dash of salt
Butter
Syrup

In a medium-size bowl, whisk together egg, milk, pumpkin pie spice, pumpkin, brown sugar and salt until well mixed. Mixture will be thick.

Carefully dip bread, one slice at a time, into the mixture, turning to coat. Let each slice soak for 1-2 minutes. Be careful turning the bread, as it absorbs the liquid it will start to fall apart if handled roughly.

Heat a medium-size pan over medium-low heat. Melt 1 tablespoon of butter in the pan. Place bread in pan. Any leftover mixture can be poured over the bread.

Cook over medium-low heat until bottom side is a dark, golden brown. If cooked on high heat, it will cook improperly — the outside will burn and the inside will be squishy. Using a spatula, carefully flip bread over. Continue cooking until both sides are dark, golden brown and outside of toast is a bit crisp.

Serve hot with butter and syrup.

Playing with pumpkin

pumpkinbread1

Fall is the season for warm flavors. At this time of year, I find myself using cinnamon, nutmeg, apples and pumpkin more often than any other season.

Pumpkin is one of my favorite ingredients to play with. It can be used in sweet dishes such as pies and muffins or turned into something savory such as pumpkin soup. Since I haven’t had a lot of time to bake lately, I went with another quick bread this week. Pumpkin-chocolate chip bread, to be exact.

The original recipe made two loaves, but I only had enough pumpkin for one. Just as I was about to put it in the oven, I remembered I had a small amount of coconut left that needed to be used, so I threw it on top of the batter in the pan. I liked the texture it gave the top.

If you let this bread cool for the time the recipe recommends, you’ll end up with a moist loaf that is easy to cut through. I’ve found that cutting certain breads right after they come out of the oven can cause them to break apart. Let this one cool. It’s worth the wait.

Ingredients
1 1/2 cups all-purpose flour
1 teaspoon ground cinnamon
1/2 teaspoon salt
1/2 teaspoon baking soda
2 eggs
1 cup sugar
1 cup canned pumpkin
3/4 cup canola oil
3/4 cup semisweet or bittersweet chocolate chips
(Optional: 1 tablespoon coconut, brown sugar or oats)

Preheat oven to 350 degrees. Grease a loaf pan.

Combine flour, cinnamon, salt and baking soda in a large bowl. In another bowl, beat the eggs, sugar, pumpkin and oil. Stir into dry ingredients until just moistened. Fold in chocolate chips.

Pour into loaf pan. Top with coconut, brown sugar or oats. Bake for 60-70 minutes, or until a toothpick inserted near the center comes out clean. Cool for 10 minutes before removing from pan and placing on wire rack.

A versatile dish for any time of day

The best thing about quiche is that you can eat it at any time of day, at any temperature and with anything in it, as long as you have a good base recipe.

For those of you who aren’t familiar with quiche, it’s a simple egg dish baked in a crust. It usually contains cheese, vegetables and meat, but is also simple enough to improvise and include only what you want. The base recipe I use is from Joy. I know I’ve posted a few recipes from the book so far, but there’s a reason it’s an American classic. I use Joy’s Pat-in-the-Pan Butter Dough for the crust and the Cheese Quiche recipe for the filling.

Gouda is my favorite cheese to use and I like to add red bell peppers, crispy prosciutto and chives to the filling. I’ve found that sauteing the vegetables and herbs ahead of time helps them cook better. If you choose to use spinach, make sure you cook it before throwing it in the filling. The general rule of thumb is not to leave the pieces of chopped vegetables too thick and not to overload the quiche — don’t use more than about 1 1/2 cups total of additions. If you use more, there may not be enough egg mixture to hold it together.

Once the quiche is done, you’ve got a meal that you can eat hot or cold at any time. It’s a good standby to have in the fridge, whether you’re expecting company or just know you won’t have time to cook during the next couple days.

Crust
1 1/2 cups all-purpose flour
1/2 teaspoon salt
1/2 cup (1 stick) butter, cut into eight pieces
2 to 3 tablespoons heavy cream
1 beaten egg yolk

Preheat oven to 425 degrees. Stir flour and salt together. With your hands or the back of a fork, mash butter in until mixture resembles coarse crumbs. Drizzle heavy cream over the top of the crust and mix in until the crumbs look damp and hold together. Pat dough into a pie dish or tart pan. Prick crust with a fork so it won’t bubble up while cooking. Bake crust for 18-22 minutes or until golden brown. While the crust is baking, prepare the filling.

After the crust comes out of the oven, turn the heat down to 375 degrees and brush the warm crust with the egg yolk.

Filling
1 1/2 cups shredded cheese (Gouda, cheddar, Monterey Jack and Swiss work well — you can use more than one kind if you’d like)
1 cup heavy cream
3 eggs
1/2 small onion, grated
1/8 teaspoon grated or ground nutmeg
1/2 teaspoon salt
1/4 teaspoon white or black pepper
(1 1/2 cups total of any chopped vegetables, meat or other additions)

Sprinkle the cheese onto the crust. Whisk the rest of the ingredients together in a medium bowl until no streaks of egg white remain. Pour the mixture evenly over the cheese in the pastry shell. Bake until the filling is puffed around the sides and a knife inserted in the center comes out clean, 30 to 40 minutes. Let stand 10 minutes before slicing.